Cat-Eye Nail Designs: Color Ideas and Magnetic Effects
Cat-Eye Nail Designs: Color Ideas and Magnetic Effects
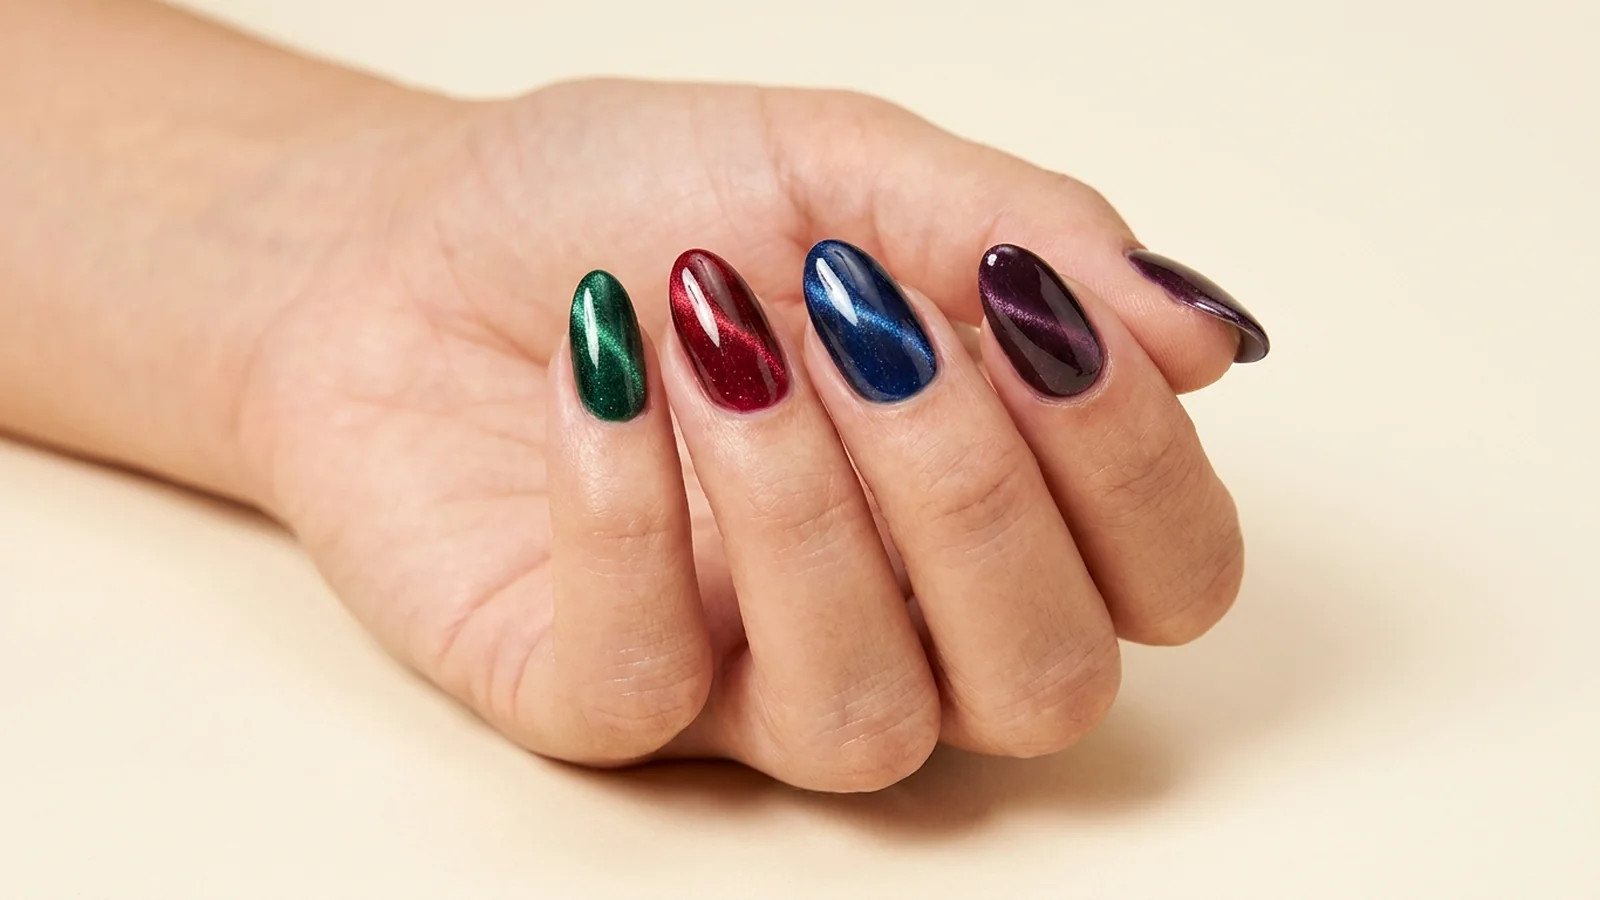
Cat-eye nail designs use reflective particles that can be guided with a magnet before the polish is set according to its instructions. The result may look like a narrow light band, a soft halo or a broad velvet-like shimmer. The color and the lighting can change the effect dramatically.
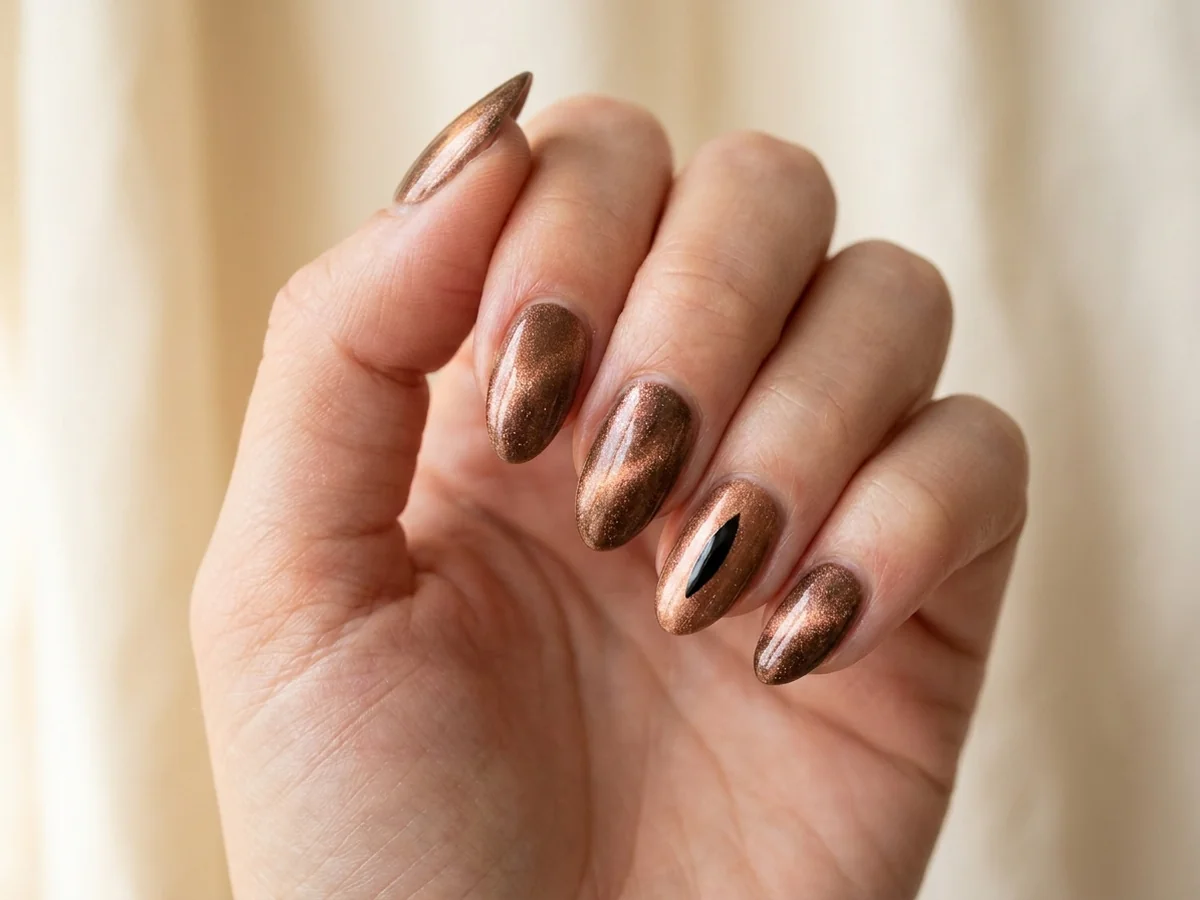
Some eye-inspired nail art uses a playful illusion: a dark slit painted over a reflective manicure to resemble a pupil. This guide keeps the manicure wearable and separates that optional painted detail from the magnetic effect itself. The illustrations are AI-generated inspiration, not tested product results.
Magnetic shimmer can be the focal point without adding a painted pupil.
Quick answer
Choose a polish specifically labeled magnetic or cat-eye, use its recommended magnet and follow the manufacturer’s setting or curing directions. Practice the effect on one tip first. A dark pupil-shaped slit is additional artwork, not something every magnetic polish automatically produces.
Table of Contents
Magnetic polish is not the same as ordinary shimmer
A shiny or metallic polish does not necessarily respond to a magnet. Look for product directions that explicitly describe a magnetic effect. Some magnetic formulas air-dry; others are gel and require a specified lamp and curing process.
The magnet shape, distance, direction and timing can affect the pattern. Follow the product’s instructions instead of using a universal number of seconds. Test away from the nail first, and do not let the magnet touch wet polish.
What you need before trying the effect
Gather the chosen magnetic polish, its suitable magnet, the base and top products required by that system, and practice tips. If it is gel, use the lamp and curing guidance specified for the product; appearance alone cannot confirm that a gel has cured correctly.
Do not apply thicker coats just to make the shimmer brighter. Keep product away from skin and cuticles. If you are new to gel, an air-drying magnetic formula may be a simpler starting point, provided you follow its instructions.
Optional supplies and similar styles
This is an optional shopping link, not a requirement for trying the idea. For decorative items, the illustration is not an exact product listing.
Affiliate disclosure: If you buy through this link, we may earn a commission at no extra cost to you. As an Amazon Associate I earn from qualifying purchases.
Home-art starting point: Requires magnetic system practice
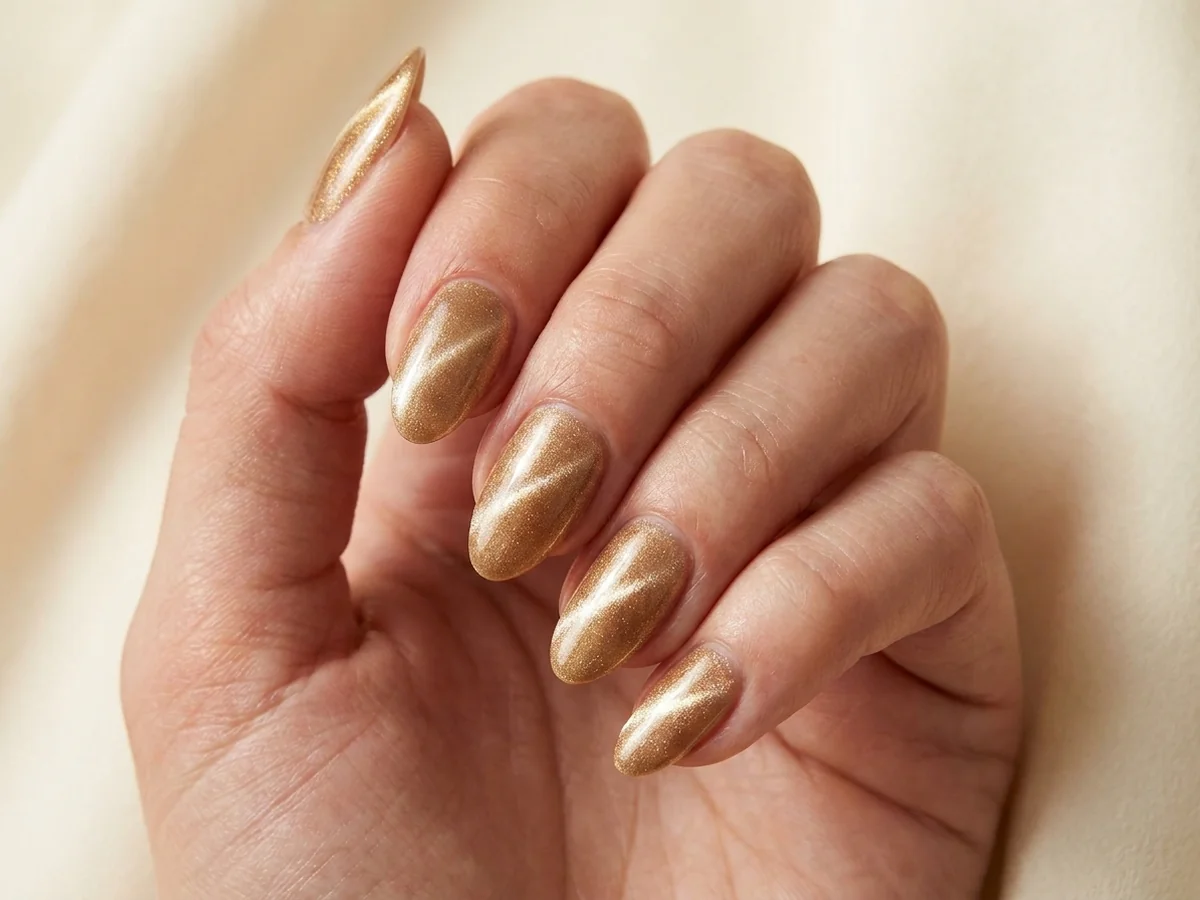
Gold works well when you want warmth without detailed painted art. Try a narrow diagonal light band on one nail, then use a softer shimmer on the remaining nails if your product allows it. Keep the silhouette uncomplicated.
The exact gold can range from pale champagne to a deeper antique tone. Compare the color in daylight as well as indoor light. The illustrated finish is a design reference, not a promise that any gold magnetic polish will reproduce it.
A diagonal light band adds movement to a warm gold manicure.
2. Silver cat-eye nails
Home-art starting point: Requires magnetic system practice
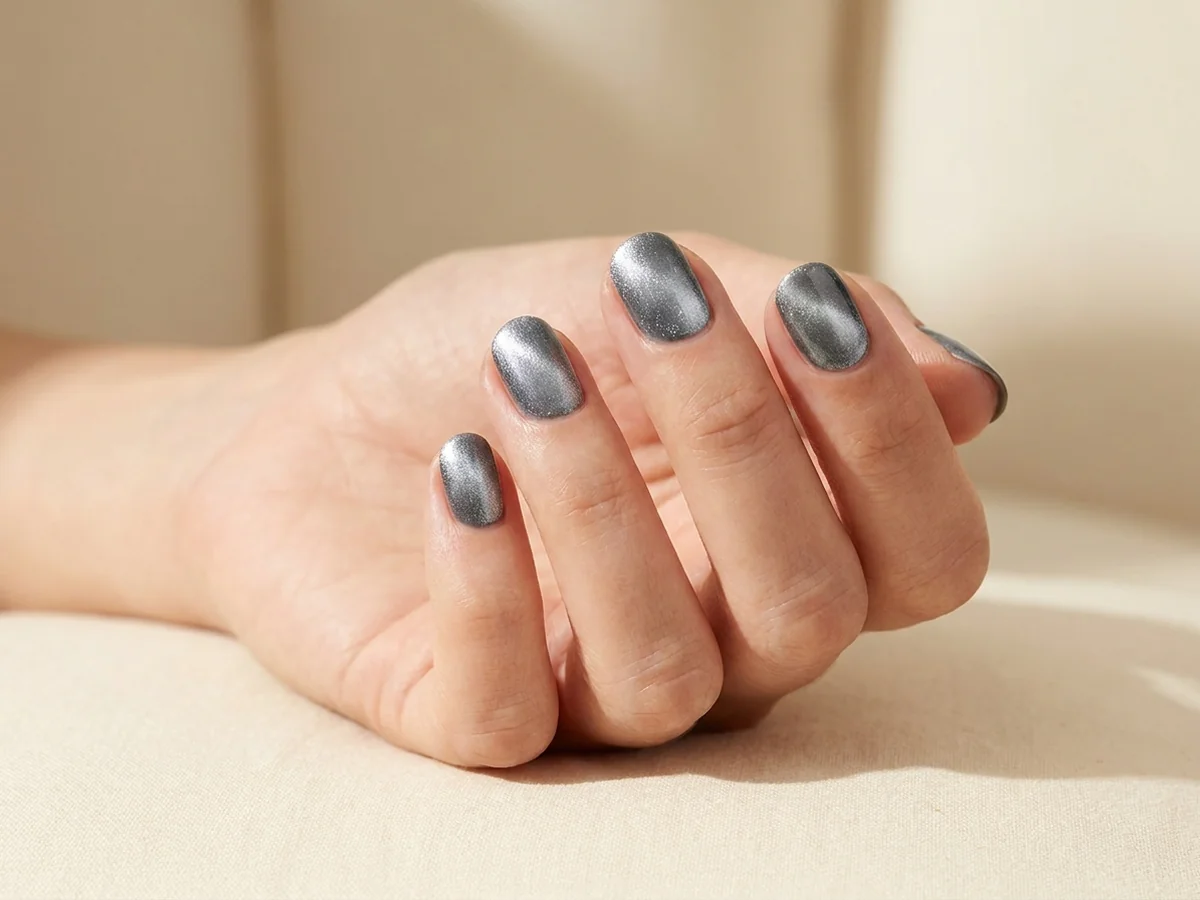
A cool silver finish makes the light band especially noticeable against a darker base, when that base is compatible with the product. Let the magnetic effect be the main detail instead of adding gems and multiple outlines.
Short rounded nails can suit silver just as well as long almond shapes. If the bright band overwhelms a small nail, experiment on a practice tip with a more diffuse pattern rather than applying more layers.
Silver shimmer works on short nails without extra decorations.
3. Emerald green cat-eye nails
Home-art starting point: Requires magnetic system practice
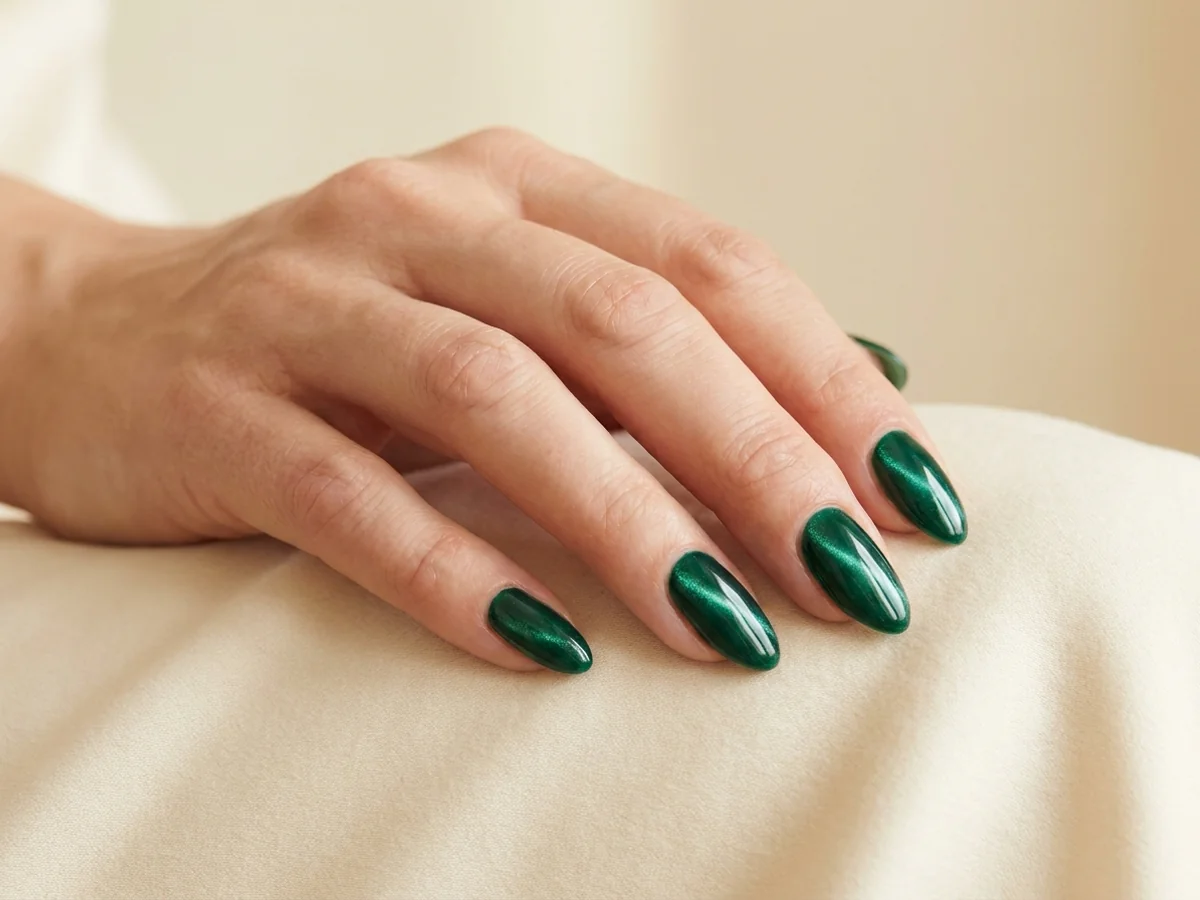
Deep green gives a jewel-tone mood, especially with a slim luminous line. Pair it with plain green companion nails if you want only one or two magnetic accents.
Watch the polish at different angles before deciding on the final pattern. A strong light can make the design look very different from soft daylight. Judge the actual test tip, not only a product listing photo or AI illustration.
A deep green base lets a small magnetic highlight stand out.
Home-art starting point: Requires magnetic system practice
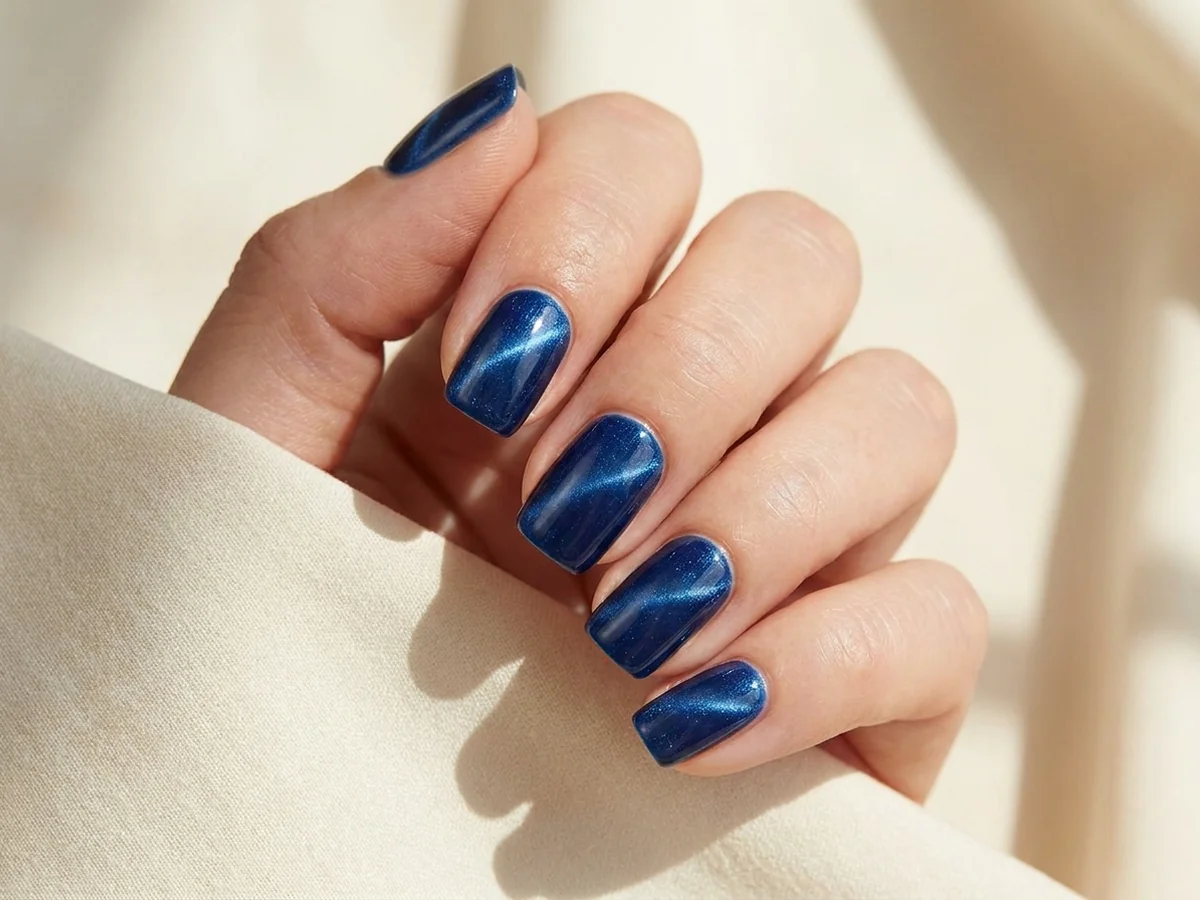
Sapphire and steel-blue tones create a cooler effect. A centered light band can emphasize an almond shape; a slightly diagonal band can add movement to a squoval nail.
Make the first test on the shape you actually wear. The same magnet placement may look different on a flat practice surface and a curved nail. Keep the remaining styling simple while you learn the product.
Blue magnetic polish offers a cool-toned alternative to gold and green.
Optional supplies and similar styles
This is an optional shopping link, not a requirement for trying the idea. For decorative items, the illustration is not an exact product listing.
Affiliate disclosure: If you buy through this link, we may earn a commission at no extra cost to you. As an Amazon Associate I earn from qualifying purchases.
Home-art starting point: Requires magnetic system practice
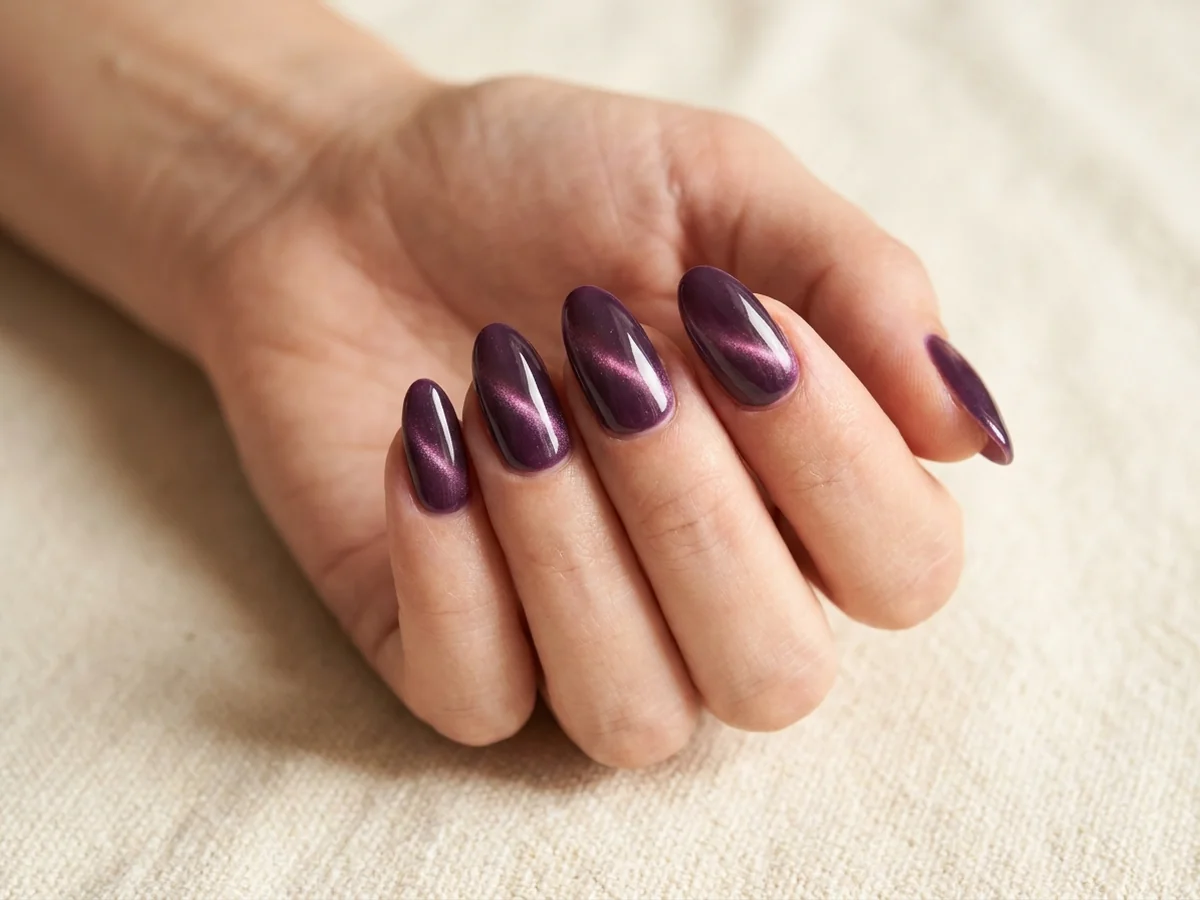
Plum can read softly in daylight and more dramatic under direct light. Choose a pink-violet reflection if you want warmth, or a cool lavender reflection for a quieter contrast.
One plum accent beside a neutral manicure can be easier to wear than a full dark set. Avoid loading the accent with additional stars, lines and stones unless you deliberately want a more detailed result.
A plum base changes character as the magnetic shimmer catches the light.
6. Ruby-red and burgundy cat-eye nails
Home-art starting point: Requires magnetic system practice
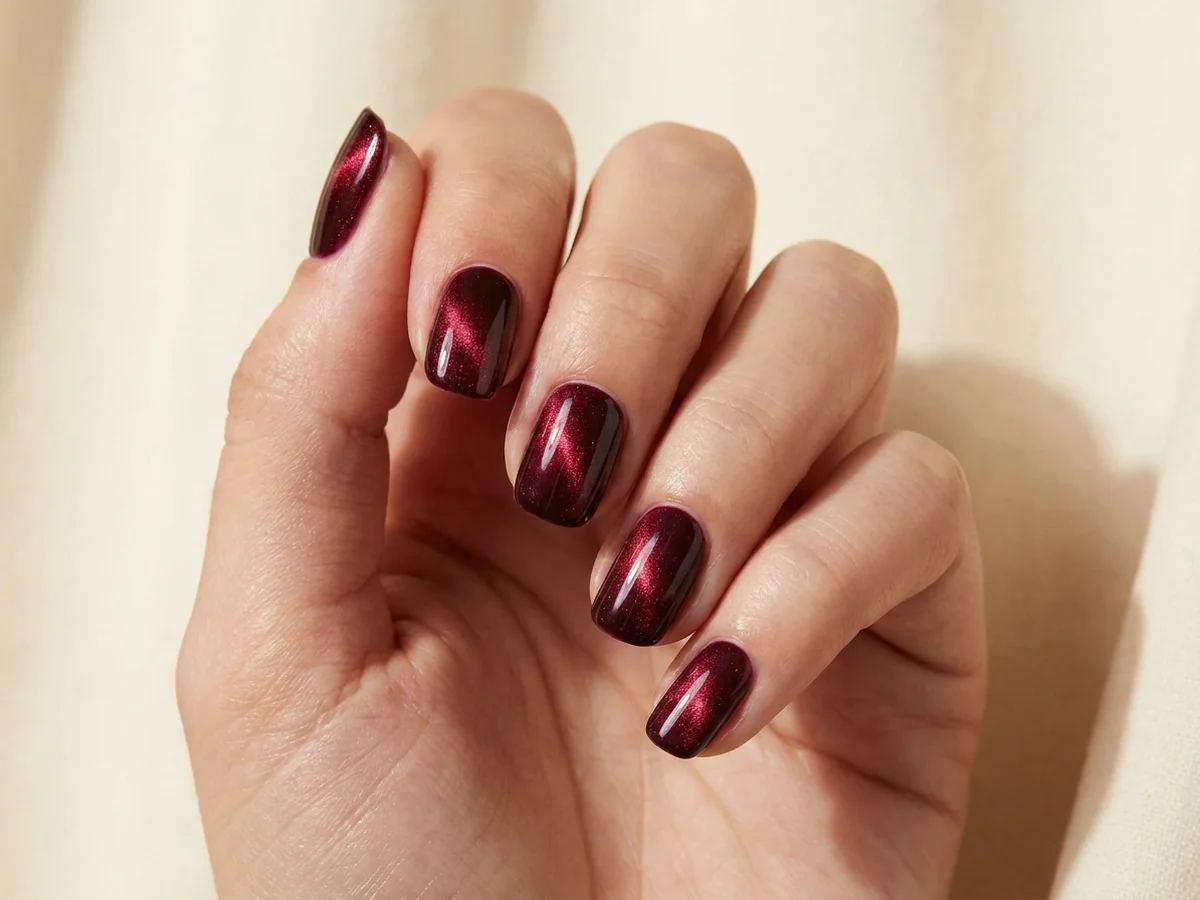
Red and burgundy make a strong contrast with a light magnetic band. Try a rounded-square shape if you want the color to carry the look without a long pointed silhouette.
If your product directions allow a dark base, test it before applying the whole manicure. A black base may deepen the color more than you expect. Do not assume every magnetic formula needs one.
A short shape balances the intensity of ruby and burgundy shades.
7. Rose-pink cat-eye nails
Home-art starting point: Requires magnetic system practice
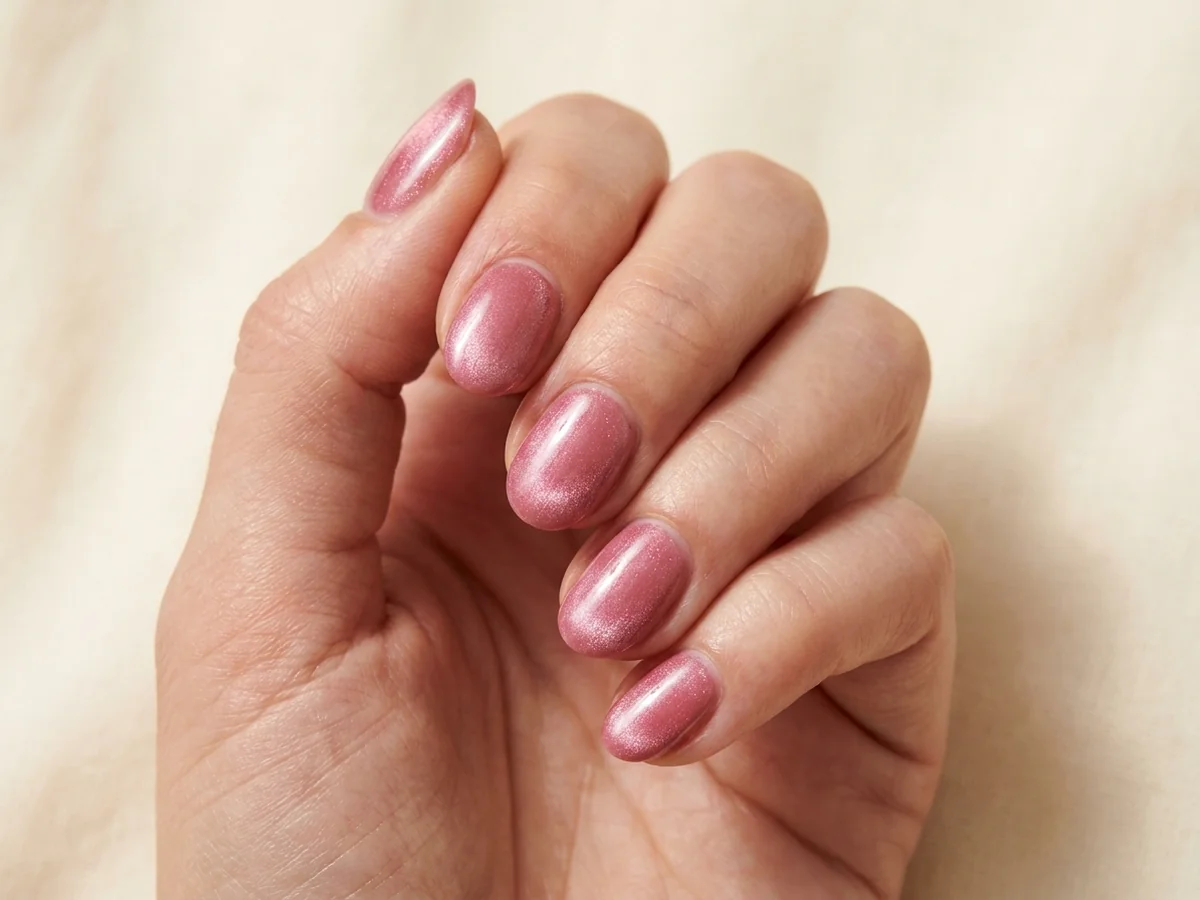
Rose pink offers a lighter alternative while still showing the reflective effect. A broad soft shimmer can suit an everyday manicure, depending on how the chosen polish responds to its magnet.
Compare the actual formula with your preferred nude or pink base. If the shimmer looks streaky, revisit the product directions and practice rather than adding an excessively thick coat.
A lighter pink palette keeps the reflective effect gentle.
8. A painted pupil accent, kept to one nail
Home-art starting point: Advanced accent; practice first
For the playful eye-inspired version, add a slim dark slit to a completed and suitably prepared magnetic base using a compatible nail-art product. This is a separate design layer, so follow the instructions for both systems.
Try it on one practice tip before committing to a whole set. Keep the slit centered and smaller than the bright area so it reads as an eye accent. Do not place hands over a pet’s eyes to recreate the reference pose; a clean manicure close-up is enough.
The dark pupil is optional painted nail art, separate from the magnetic shimmer.
A practical test-tip workflow
Read the instructions for the entire system before opening the polish. Prepare a practice tip, apply the specified base and magnetic coat, then hold the magnet in the recommended position without touching the surface. Set or cure the product exactly as directed.
Write down which magnet orientation produced your favorite result. Continue with one nail at a time if the manufacturer recommends that approach. Use the required top coat and setting process rather than assuming another brand behaves identically.
If the pattern is weak, check that the polish is actually magnetic and that you are using the recommended magnet and sequence. Some effects soften as air-drying polish settles; follow any top-coat magnet guidance supplied by the brand.
If gel feels irritating or gets onto skin, stop and follow appropriate removal guidance. Do not rely on touch or gloss to judge a cure. If your setup is uncertain, ask a qualified nail professional instead of guessing a lamp time.
Gel safety belongs in the plan
Keep uncured gel off skin, do not trim cuticles for the design, and avoid picking or peeling off a finished manicure. The American Academy of Dermatology recommends protecting hands from UV exposure during gel manicures, such as with suitable fingerless gloves or broad-spectrum sunscreen as advised in its guidance.
Seek medical advice if you develop persistent redness, swelling, itching or nail changes. These design suggestions do not replace product directions or individual medical advice.
Optional supplies and similar styles
This is an optional shopping link, not a requirement for trying the idea. For decorative items, the illustration is not an exact product listing.
Affiliate disclosure: If you buy through this link, we may earn a commission at no extra cost to you. As an Amazon Associate I earn from qualifying purchases.
Ordinary shimmer polish will not necessarily respond to a magnet. Use a formula explicitly designed for a magnetic effect and follow its directions.
Do all cat-eye polishes need a curing lamp?
No. There are air-drying magnetic products and gel products. Gel needs its specified compatible curing setup; air-drying polish does not become gel because a lamp is used.
Does the magnet create the black pupil?
Not automatically. The reflective band comes from the magnetic particles. A dark slit in an eye-inspired design is often separate painted artwork.
Why does the photo look different from my manicure?
Lighting, viewing angle, camera processing, formula and magnet technique all change the appearance. AI illustrations can exaggerate effects, so compare your test tip under more than one light source.
For a painted nature-themed accent, the insect-inspired nail artguide offers butterflies and tiny garden motifs.
Begin with the color you like, then learn one magnetic pattern on a practice tip. You do not need a pupil, extra stones or an elaborate shape for a cat-eye manicure to have a strong focal point.