 Beauty
25 DIY Halloween Jewelry Ideas
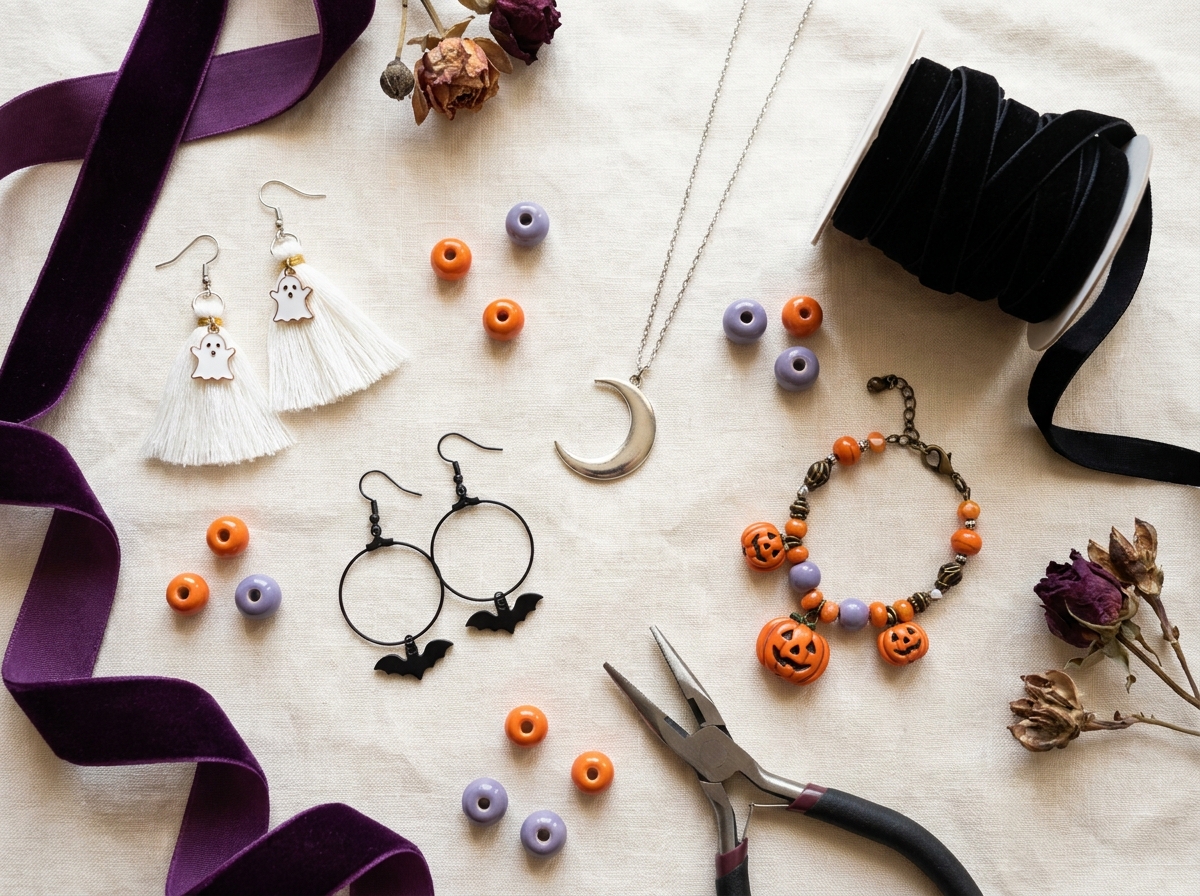
Handmade Halloween jewelry can be bold enough for a costume or subtle enough for everyday fall outfits. These 25 ideas use accessible techniques—jump rings, charms, beads, polymer clay, felt and prepared jewelry blanks—without requiring soldering or advanced metalwork.
> Quick answer: Begin with charm earrings, a pendant necklace, stretch bracelet or prepared ring blank. Use lightweight components, close every jump ring fully and choose findings that suit your skin. Polymer-clay ghosts, moon-phase necklaces and Halloween charm bracelets are the most versatile projects.
On this page
- Basic jewelry-making kit
- 1. Polymer-Clay Ghost Earrings
- 2. Tiny Pumpkin Studs
- 3. Black-Cat Silhouette Earrings
- 4. Spiderweb Hoop Earrings
- 5. Bat Dangle Earrings
- 6. Mismatched Moon-and-Star Earrings
- 7. Candy-Corn Bead Drops
- 8. Oxblood Teardrop Earrings
- 9. Velvet Bat Choker
- 10. Moon-Phase Necklace
- 11. Mini Potion-Bottle Necklace
- 12. Skeleton-Key Pendant
- 13. Raven Cameo Necklace
- 14. Crystal Spider Pendant
- 15. Embroidered Eye Brooch
- 16. Beaded Pumpkin Brooch
- 17. Spiderweb Collar Pins
- 18. Gothic Safety-Pin Brooch
- 19. Halloween Charm Bracelet
- 20. Black-and-Orange Stretch Bracelet
- 21. Morse-Code “BOO” Bracelet
- 22. Charm Cuff Bracelet
- 23. Wire Spider Ring
- 24. Mini Skull Stack Ring
- 25. Haunted Locket
- Choose the right findings
- Metal sensitivity and skin comfort
- Craft safety
- Make the jewelry look polished
- Packaging and gifting
- Frequently asked questions
- Final recommendation
Basic jewelry-making kit
- Chain-nose and round-nose pliers
- Flush cutters intended for jewelry wire
- Jump rings in two useful sizes
- Ear wires, stud posts, clasps and chain
- Head pins and eye pins
- Smooth beads and lightweight charms
- Jewelry adhesive for prepared findings
- Ruler, bead mat and small storage trays
- Polymer clay or shrink plastic for selected projects
1. Polymer-Clay Ghost Earrings
Shape two small white ghosts from conditioned polymer clay, pierce attachment holes before baking according to the clay instructions, then add jump rings and ear wires after cooling.
Difficulty: Beginner.
Main materials: Polymer clay, jump rings, ear wires.
2. Tiny Pumpkin Studs
Form matching orange clay pumpkins, add shallow lines with a blunt tool and attach them to flat stud posts with an adhesive intended for jewelry findings.
Difficulty: Beginner.
Main materials: Polymer clay, stud posts, jewelry adhesive.
3. Black-Cat Silhouette Earrings
Cut matching cat shapes from shrink plastic, punch holes before shrinking and finish with simple black hooks.
Difficulty: Beginner.
Main materials: Shrink plastic, hole punch, ear wires.
4. Spiderweb Hoop Earrings
Wrap thin craft wire between the inner and outer edges of a hoop to create a web, then add one lightweight spider charm.
Difficulty: Intermediate.
Main materials: Hoops, fine wire, small charms.
5. Bat Dangle Earrings
Attach lightweight bat charms to short chain lengths and finish with comfortable ear wires. Keep both sides equal so they hang evenly.
Difficulty: Beginner.
Main materials: Bat charms, chain, jump rings.
6. Mismatched Moon-and-Star Earrings
Pair one crescent charm with one star charm in the same metal finish for an intentional asymmetrical set.
Difficulty: Beginner.
Main materials: Moon and star charms, ear wires.
7. Candy-Corn Bead Drops
Stack white, orange and yellow beads on head pins, form a secure loop and hang them from hooks.
Difficulty: Beginner.
Main materials: Beads, head pins, round-nose pliers.
8. Oxblood Teardrop Earrings
Use deep red glass or acrylic teardrop beads with black findings for a subtle vampire look that works beyond Halloween.
Difficulty: Beginner.
Main materials: Teardrop beads, black findings.
9. Velvet Bat Choker
Thread a flat bat charm onto soft black velvet ribbon and add ribbon ends, a clasp and extender chain.
Difficulty: Intermediate.
Main materials: Velvet ribbon, ribbon ends, clasp.
10. Moon-Phase Necklace
Space moon-phase charms across a short chain, checking the layout on a flat surface before closing jump rings.
Difficulty: Intermediate.
Main materials: Chain, moon charms, clasp.
11. Mini Potion-Bottle Necklace
Use a sealed empty miniature bottle charm filled only with dry glitter or tiny beads. Do not use unknown liquids or leave the stopper unsecured.
Difficulty: Beginner.
Main materials: Bottle charm, dry beads, chain.
12. Skeleton-Key Pendant
Hang one decorative key charm on a medium-length chain and add a small black crystal above it for a simple gothic focal point.
Difficulty: Beginner.
Main materials: Key charm, crystal bead, chain.
13. Raven Cameo Necklace
Place a raven illustration beneath a clear cabochon using a jewelry-cabochon method, then set it into a prepared pendant tray.
Difficulty: Intermediate.
Main materials: Pendant tray, cabochon, printed art.
14. Crystal Spider Pendant
Join a small spider connector to a faceted black or smoky bead and suspend it from a fine chain.
Difficulty: Beginner.
Main materials: Spider connector, crystal bead, chain.
15. Embroidered Eye Brooch
Stitch a stylized eye onto felt, back it with another felt layer and attach a locking brooch pin.
Difficulty: Intermediate.
Main materials: Felt, embroidery floss, brooch back.
16. Beaded Pumpkin Brooch
Arrange orange seed beads inside a small embroidery hoop or stitched felt pumpkin, then add a brooch backing.
Difficulty: Intermediate.
Main materials: Seed beads, felt, brooch back.
17. Spiderweb Collar Pins
Make two small matching web pins and connect them with a removable chain to wear across a shirt collar.
Difficulty: Intermediate.
Main materials: Pin backs, chain, web charms.
18. Gothic Safety-Pin Brooch
Use a purpose-made large jewelry pin and add lightweight chain, black beads and one charm. Avoid ordinary sharp pins that cannot lock securely.
Difficulty: Beginner.
Main materials: Jewelry kilt pin, chain, beads.
19. Halloween Charm Bracelet
Attach a balanced mix of moon, ghost, pumpkin and bat charms to a comfortable bracelet chain, leaving enough room for movement.
Difficulty: Intermediate.
Main materials: Bracelet chain, clasp, charms.
20. Black-and-Orange Stretch Bracelet
String smooth black, orange and metallic spacer beads onto jewelry elastic, test the fit and finish with a secure knot approved for the cord.
Difficulty: Beginner.
Main materials: Beads, jewelry elastic.
21. Morse-Code “BOO” Bracelet
Translate “BOO” into short and long bead groups, separating letters with small spacer beads. Include a key on a gift card.
Difficulty: Beginner.
Main materials: Two bead shapes, spacers, cord.
22. Charm Cuff Bracelet
Slide or wire-wrap two lightweight charms onto an adjustable cuff without leaving sharp wire ends against the skin.
Difficulty: Intermediate.
Main materials: Cuff blank, charms, wire.
23. Wire Spider Ring
Form a simple adjustable ring from jewelry wire and shape a small spider with a bead body. File or tuck every cut end.
Difficulty: Intermediate.
Main materials: Jewelry wire, bead, pliers.
24. Mini Skull Stack Ring
Glue a lightweight skull cabochon to a prepared adjustable ring blank using jewelry adhesive and let it cure fully before wearing.
Difficulty: Beginner.
Main materials: Skull cabochon, ring blank.
25. Haunted Locket
Place a tiny ghost, vintage house or moon image inside a locket and add one bead or ribbon detail outside.
Difficulty: Beginner.
Main materials: Locket, miniature image, chain.
Choose the right findings
Earrings
Keep dangles lightweight and use ear wires or posts from a reliable jewelry supplier. People with metal sensitivity may need nickel-free, titanium, niobium, surgical-grade stainless steel or another material recommended for them; “hypoallergenic” alone is not a complete specification.
Necklaces and chokers
Measure before cutting chain or ribbon. Chokers should fit comfortably and include an extender rather than sitting tightly against the neck.
Bracelets
Leave enough room for wrist movement and check that charm placement does not snag sleeves. Stretch cord needs a knot appropriate for that exact cord.
Rings and brooches
Tuck or file wire ends and use locking pin backs. Let adhesive cure for the full time stated before wearing.
Metal sensitivity and skin comfort
Nickel is a common cause of allergic contact dermatitis, and jewelry is a frequent exposure source. If you know you have a nickel allergy, avoid nickel-containing components and choose suitable alternative findings. Stop wearing a piece if itching, redness or a rash develops.
Craft safety
- Wear eye protection when cutting stiff wire
- Cut away from the body and collect sharp wire ends
- Bake polymer clay only as the manufacturer directs
- Ventilate when using adhesives and follow the label
- Do not use uncured resin or unknown metal components against skin
- Keep small beads and findings away from young children and pets
- Check every clasp, jump ring and sharp edge before gifting
Make the jewelry look polished
Limit each piece to one focal motif, repeat the same metal finish, keep earrings balanced in weight and photograph finished pieces against a simple background. Matte black, oxblood, smoky crystal, antique silver and restrained orange tend to look more refined than mixing every Halloween color at once.
Packaging and gifting
Use a labeled jewelry card with the material information you know, basic care instructions and a note that small parts are not intended for young children. Store earrings separately so hooks do not tangle, and wrap polymer-clay pieces so they cannot bend in transit.
Frequently asked questions
What is the easiest Halloween jewelry to make?
Charm earrings, a single pendant necklace, a stretch bracelet or a cabochon ring blank require the fewest construction steps.
What jewelry is best for sensitive ears?
There is no universal material for everyone. People with nickel allergy should avoid nickel-containing findings and choose an appropriate alternative from a reliable supplier.
Can I use hot glue for jewelry?
Hot glue is usually bulky and less durable on small metal findings. Use an adhesive intended for the specific jewelry materials and follow its cure time.
How do I stop jump rings opening?
Open them sideways with two pliers, not by pulling the circle apart. Close until the ends meet cleanly and inspect before wearing.
Can children make these projects?
Many pieces contain small parts, sharp wire, cutters, adhesives or hot materials. Adult supervision and age-appropriate substitutions are necessary.
Final recommendation
Make one matching set rather than 25 unrelated pieces: ghost earrings with a moon pendant, or a charm bracelet with a simple ring. Repeating the same metal finish and two or three colors creates a more wearable result.
Next, explore Trending Halloween Earrings and Necklaces or follow How to Make a Halloween Charm Bracelet.